
Standard Kitchen Switch Height: The Quick Answer
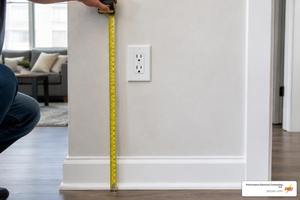
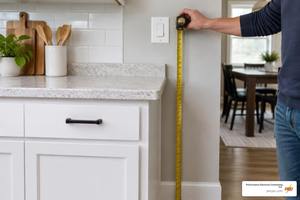
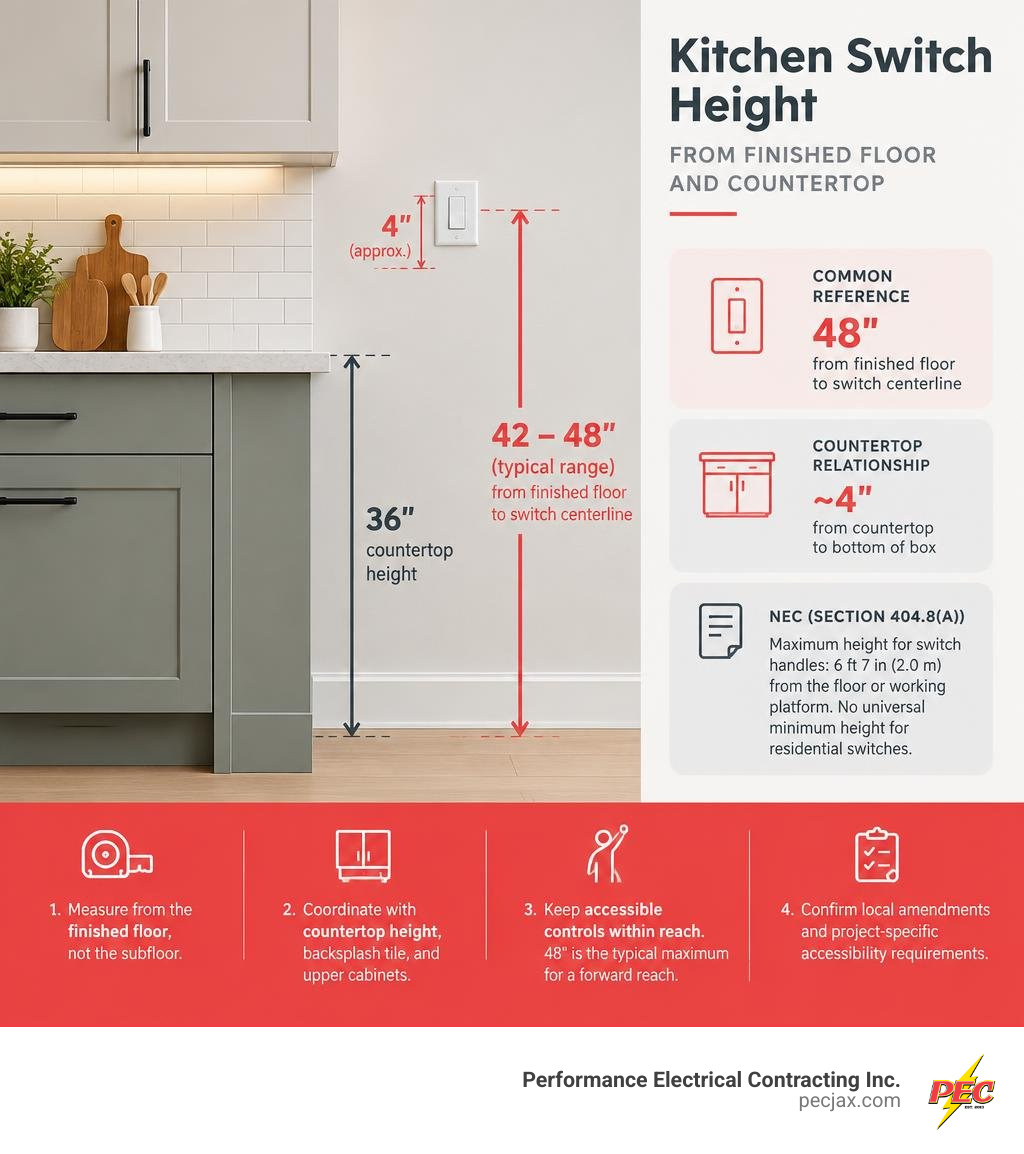
For most kitchen remodels, set the switch centerline about 42 to 48 inches above the finished floor. The common residential reference is 48 inches, but a switch located over a standard 36-inch countertop is often placed with the bottom of the electrical box about 4 inches above the counter. That usually puts the switch at roughly 40 to 46 inches from the finished floor, depending on the box, plate, and countertop details.
Use these checks before rough-in:
- Measure from the finished floor, not the subfloor.
- Coordinate the switch with countertop height, backsplash tile, and upper cabinets.
- Keep accessible controls within the applicable reach range; 48 inches is the typical maximum for an unobstructed forward reach.
- Confirm local amendments and project-specific accessibility requirements. The NEC does not set one standard residential switch height, though it does limit general-use switch mounting height.
Getting kitchen switch height right prevents a small layout choice from becoming an expensive drywall, tile, or cabinet correction later. It also helps property managers deliver a cleaner finish, consistent controls, and a safer, easier-to-use kitchen.
Understanding Standard Kitchen Switch Height and National Codes
When planning an electrical rough-in, electricians and general contractors rely on established industry practices alongside strict safety regulations. While homeowners frequently assume there is a single mandatory number for every light switch in the house, the reality is more nuanced.
According to the National Electrical Code (NEC) Section 404.8(A), all switches and circuit breakers used as switches must be installed so the center of the grip of the operating handle, in its highest position, is not more than 6 feet 7 inches (2.0 meters) above the floor or working platform. Beyond establishing this maximum upper ceiling limit, the NEC does not mandate a universal minimum height for general-use residential wall switches. To master these principles, reviewing electrical code basics is an essential starting point for any remodeling project.
In everyday residential construction, the industry trade standard has long settled on 48 inches from the finished floor to the center of the electrical box. This 48-inch guideline emerged largely because standard drywall sheets measure 4 feet wide. Installing boxes at 48 inches allows drywallers to make simple horizontal cuts along sheet edges rather than carving awkward holes through the center of panels.
However, kitchens present a unique working environment. Between base cabinets, countertop prep surfaces, tile backsplashes, and overhead cabinetry, the standard wall height often requires practical adjustments. While external resources like Bob Vila’s light switch height guidelines detail general residential rules, kitchen spaces demand tailored dimensions to preserve ergonomic function and aesthetic symmetry. Local municipal amendments may also introduce specific requirements that override general trade conventions.
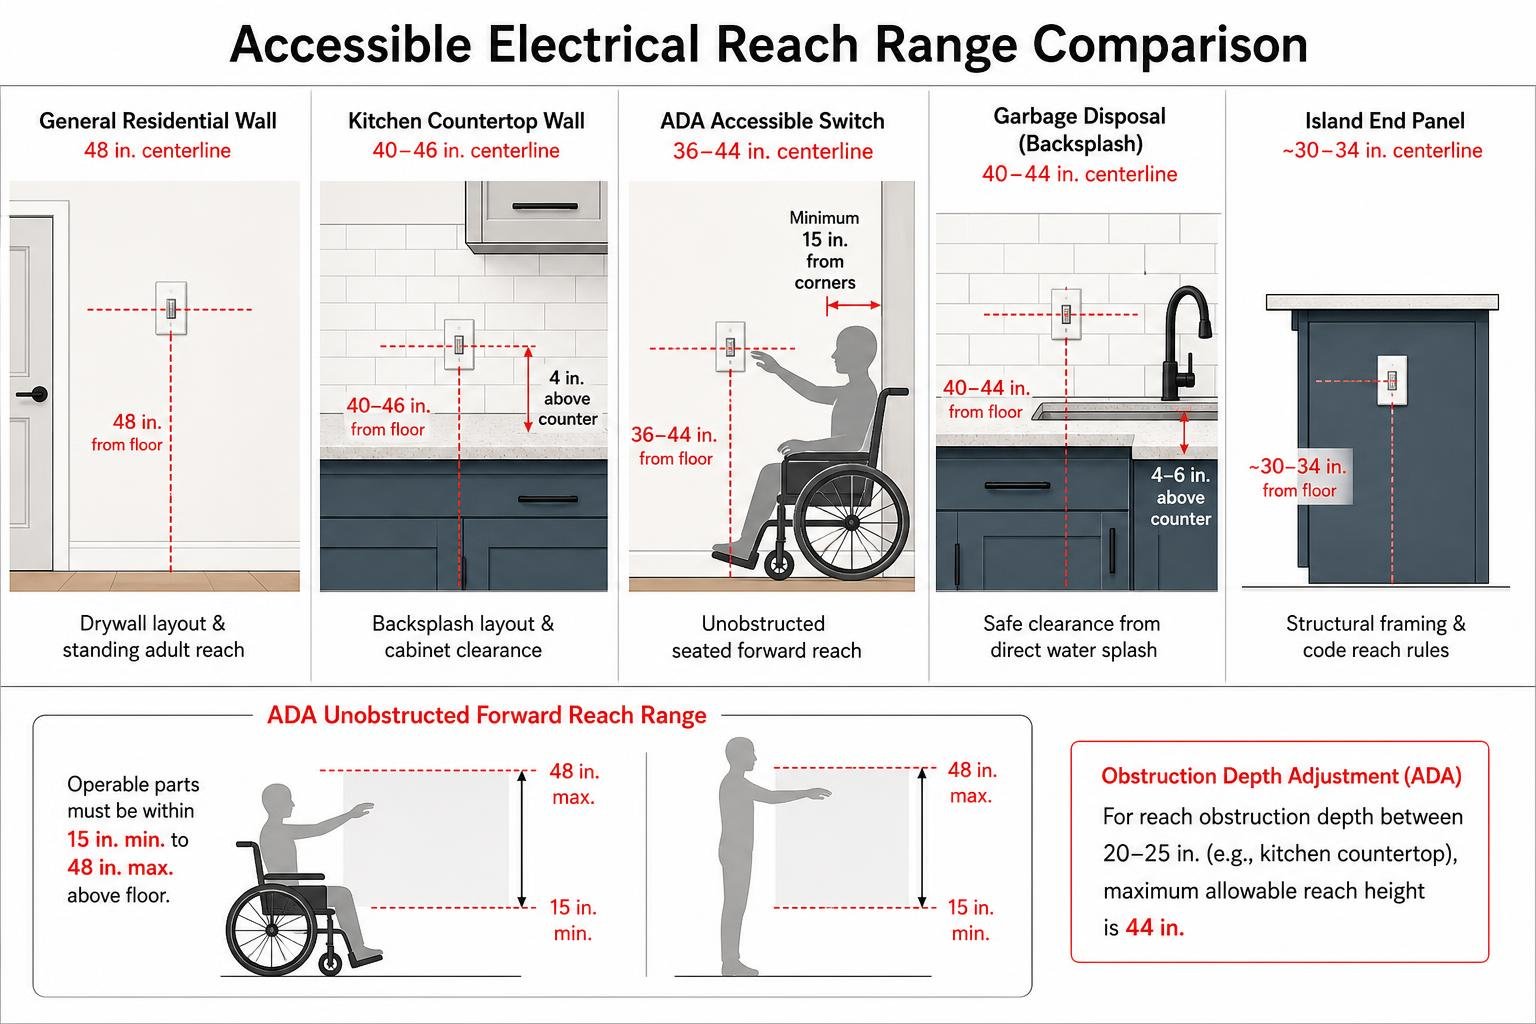
| Location / Application | Standard Height (Centerline) | Distance Above Surface | Primary Determining Factor |
|---|---|---|---|
| General Residential Wall | 48 inches from finished floor | N/A | Drywall layout & standing adult reach |
| Kitchen Countertop Wall | 40 to 46 inches from finished floor | 4 inches above counter | Backsplash layout & cabinet clearance |
| ADA Accessible Switch | 36 to 44 inches from finished floor | Minimum 15 in. from corners | Unobstructed seated forward reach |
| Garbage Disposal (Backsplash) | 40 to 44 inches from finished floor | 4 to 6 inches above counter | Safe clearance from direct water splash |
| Island End Panel | Tailored to cabinet rail (~30–34 in.) | N/A | Structural framing & code reach rules |
General Wall Switches vs. Countertop Switch Placement
A standard room switch sits on an open wall near an entryway latch. Centering the box 48 inches above the finished floor places the switch at natural standing hip-to-elbow level for an average adult, allowing you to easily operate the lighting without stretching or bending down.
In contrast, kitchen perimeter walls feature standard 36-inch-high base cabinets topped with quartz, granite, or laminate work surfaces. If you were to mount a countertop switch at the standard 48-inch centerline, the switch plate would float awkwardly in the upper section of the backsplash, potentially clashing with the bottom edges of upper cabinets or under-cabinet task lighting strips.
As highlighted in guides on proper wall switch heights, standard practice lowers countertop-mounted switches so the bottom of the electrical box sits roughly 4 inches above the countertop surface. Because finished base counters stand at 36 inches, this calculation places the overall switch centerline between 40 and 44 inches from the finished floor. When installing multi-gang switch banks that combine main kitchen lighting, pendant tracks, and under-cabinet dimmers, maintaining a perfectly level horizontal centerline ensures a clean, cohesive appearance across the entire wall.
ADA Compliance and Accessibility Standards
Accessibility guidelines establish strict boundaries for control placements in both commercial properties and modern accessible residential designs. The Americans with Disabilities Act (ADA) Standards for Accessible Design state that operable parts—including light switches, dimmers, and environmental controls—must fall within an unobstructed forward reach range between 15 inches minimum and 48 inches maximum above the finished floor.
For individuals using wheelchairs or mobility aids, a switch installed right at the 48-inch maximum can prove challenging to reach across a deep base cabinet. Because standard kitchen countertops extend 24 to 25.5 inches outward from the drywall, the reach depth creates an obstruction. Under ADA rules, if an reach obstruction depth measures between 20 and 25 inches, the maximum allowable reach height drops to 44 inches.
Applying universal design principles means mounting accessible kitchen switches at a 40-to-44-inch centerline, ensuring full usability for people of all physical capabilities, petite adults, and aging-in-place homeowners. Additionally, accessible switches must sit at least 15 inches away from inside wall corners to ensure sufficient side clearance for wheelchair footrests.
Countertop, Island, and Backsplash Switch Placement Rules
Integrating electrical rough-in boxes into a kitchen backsplash requires careful coordination among several trades, including framers, cabinetmakers, tile setters, and electricians.
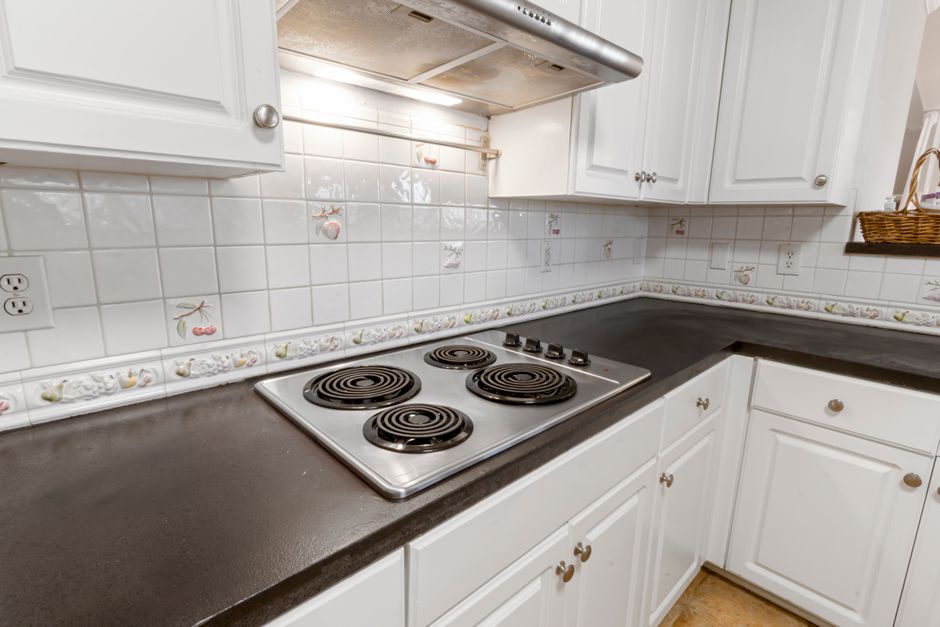
The vertical span between a 36-inch countertop and the underside of standard upper wall cabinets is typically 18 inches. This 18-inch clearance zone must accommodate your wall switches, general-purpose appliance receptacles, and specialized accent controls while avoiding common Florida electrical code violations such as improper box depths or inadequate spacing near plumbing fixtures.
The NEC mandates that no point along a kitchen countertop wall space be farther than 24 inches from an electrical receptacle outlet, ensuring that small kitchen appliances with standard two-foot cords can plug in anywhere along the workspace. While switches do not fall under this strict receptacle spacing mandate, they are frequently ganged together with countertop outlets inside multi-gang electrical boxes. Keeping these boxes leveled at a consistent elevation preserves the visual symmetry of your tile backsplash.
Measuring Kitchen Switch Height Above Countertops and Backsplashes
To achieve an attractive and functional installation, apply the 4-inch clearance rule. Positioning the bottom edge of the switch box roughly 4 inches above the finished countertop plane provides multiple practical benefits:
- Splash Zone Protection: Elevates electrical devices above accidental liquid spills, standing moisture, and food preparation messes.
- Appliance Clearance: Keeps cords and appliance bodies from constantly bumping against switch toggles and rocker paddles.
- Backsplash Proportions: Centers the switch box cleanly inside popular tile arrangements, such as standard 3×6 subway tile or 4-inch slab granite backsplashes.
- Cabinet Clearance: Leaves 10 to 12 inches of open vertical drywall space above the switch plate, preventing interference with under-cabinet light valances or decorative crown moldings.
Professional electricians never guess these heights on raw wall studs. We establish a finished floor reference benchmark, account for countertop slab thickness (typically 1.25 inches for 3cm stone), and utilize self-leveling cross-line lasers or pre-marked story poles to align every single box across multiple stud bays.
Garbage Disposal Switches and Island Locations
Positioning switches for dedicated kitchen appliances like garbage disposals involves balancing immediate reach with accidental operation safety. A traditional disposal switch sits on the backsplash wall adjacent to the kitchen sink, mounted at the standard 40-to-44-inch height. This location allows you to operate the switch with one hand while managing the sink faucet with the other, situated at a safe distance outside the direct sink water basin splash zone.
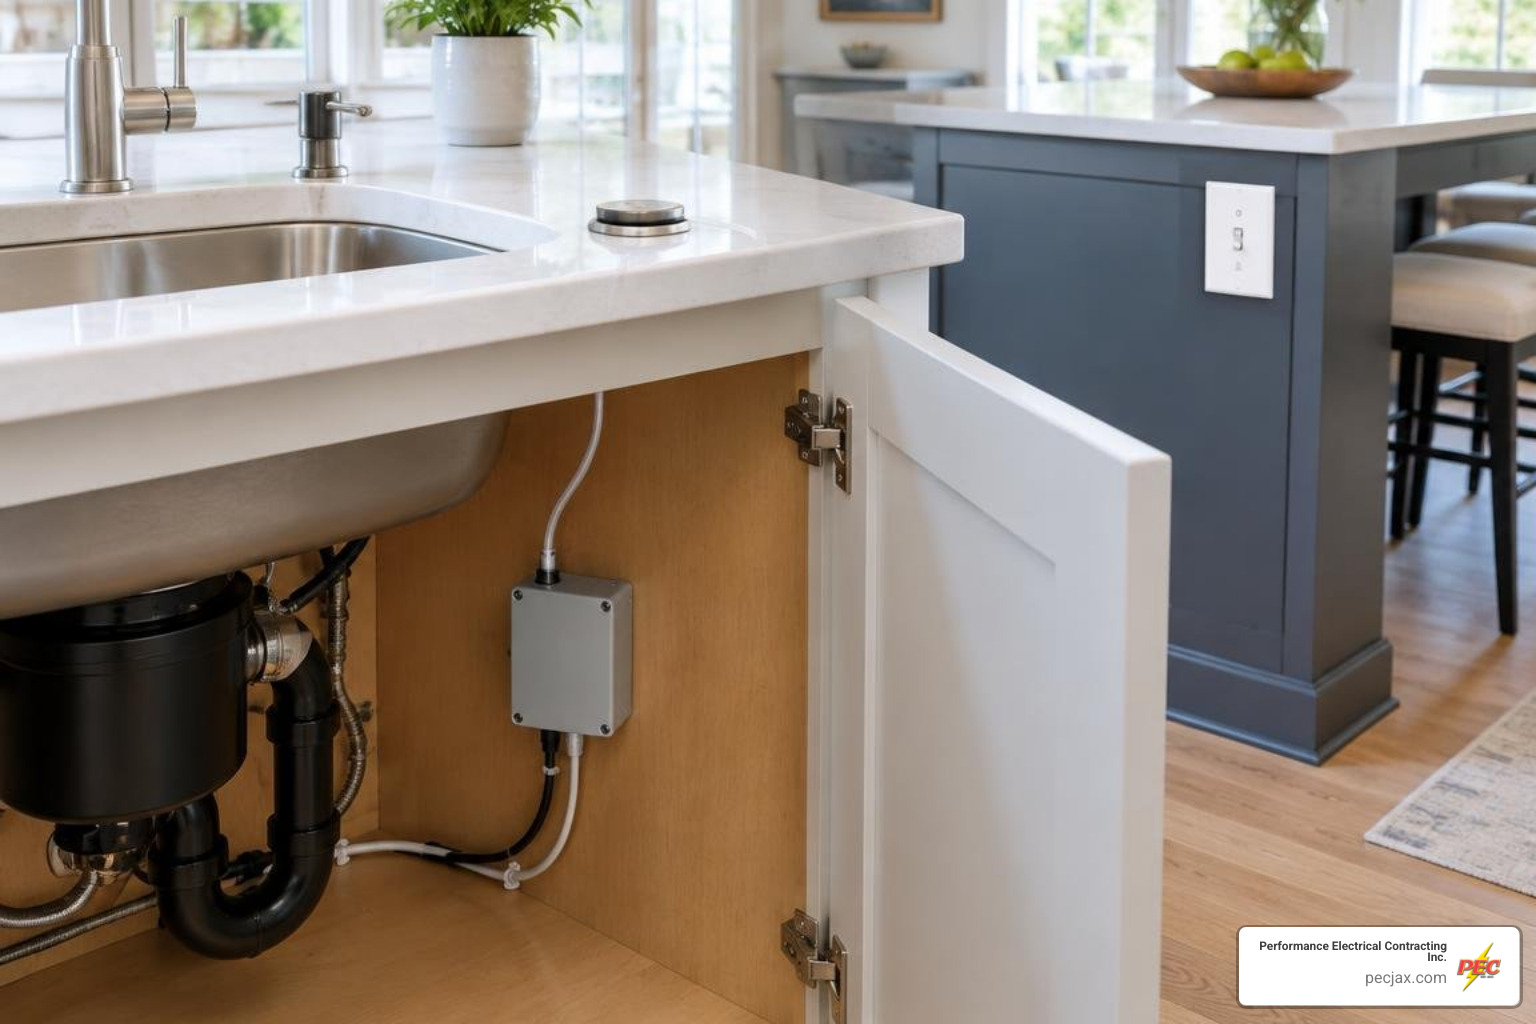
In modern open-concept kitchens featuring central islands or peninsulas without adjacent walls, mounting switches requires alternative solutions. For dedicated garbage disposal operation, an increasingly popular approach replaces wall switches with a countertop-mounted pneumatic air button. These systems use air pressure transferred through a small flexible vinyl tube to trigger a remote electrical relay under the sink base cabinet, completely eliminating 120-volt wiring from the wet countertop surface.
When main room lighting or island pendant dimmers must be mounted directly onto a kitchen island, electricians install electrical boxes inside the structural cabinet end panels. In these configurations, our residential electrical services ensure that all island wiring complies with NEC box fill, physical protection, and tamper-resistant GFCI regulations.
Step-by-Step Installation and Layout Planning for Kitchen Remodels
Executing a kitchen remodel without layout errors requires a systematic planning framework during the initial rough-in phase before insulation and drywall cover the studs.
Follow this step-by-step checklist during rough-in layout planning:
- Establish Finished Floor Elevation (FFE): Identify the final flooring material (hardwood, thick porcelain tile, or vinyl plank) and mark the true finished floor line on raw wall studs.
- Verify Cabinet and Countertop Specs: Confirm the exact height of base cabinets, countertop thickness, and the bottom line of upper cabinets from architectural shop drawings.
- Deploy Cross-Line Laser Level: Project a continuous horizontal reference line across all kitchen walls to ensure identical box heights across varying stud surfaces.
- Set Box Stud Face Offset: Adjust the mounting bracket on each electrical box so it sits proud of the stud by the exact thickness of the finished wall material (e.g., 1/2-inch drywall plus tile backsplash thickness).
- Confirm Structural Clearances: Ensure boxes are not placed where cabinet mounting rails, range hoods, or decorative trim screws will penetrate the wall cavity.
- Schedule Rough-In Inspection: Secure local municipal approvals following our guidelines on electrical inspection and permitting rules before closing up wall cavities.
Factors That Alter Placement: Cabinets, Tile, and User Height
Several architectural variables can necessitate shifting your kitchen switch boxes up or down an inch or two from standard benchmarks.
Under-cabinet lighting installations frequently feature deep decorative face frames (valances) designed to conceal light fixtures. If a switch box is mounted too high on the backsplash, the oversized decorative wall plate may collide with this downward-hanging wooden lip.
Tile patterns also influence final positioning. In high-end custom kitchens featuring full-height mosaic tiles, patterned encaustic tiles, or continuous quartz slab backsplashes, adjusting the switch height slightly allows the box to center cleanly within a specific tile course or grout joint. This avoids sliver cuts in delicate tiles, creating a much cleaner aesthetic finish.
Finally, consider the primary users of the space. Taller families may prefer switches mounted slightly higher at a 46-inch centerline to reduce bending, whereas households designing for universal accessibility benefit from lowering controls toward a 40-to-42-inch range.
Adjusting Existing Kitchen Switch Height Without Major Rewiring
When remodeling an existing kitchen, you will often find existing switch boxes mounted at awkward heights left over from previous decades. Fortunately, shifting an existing switch up or down several inches does not always require complete home rewiring.
If the non-metallic sheathed cable (Romex) inside the wall cavity contains sufficient slack, an electrician can cut a new opening in the drywall at the desired height, pull the existing cable into an “old-work” (remodel) junction box, and patch the abandoned drywall opening.
When the existing wiring lacks enough slack to reach the new elevation safely, you cannot simply bury a spliced wire inside the finished wall. Code mandates that all wire splices remain permanently accessible inside an approved junction box. In such cases, electricians can install a low-profile junction box with a blank decorative cover plate at the original location, or pull a fresh run of cable from the nearest accessible source, creating a clean upgrade when upgrading old outlets and switches.
Frequently Asked Questions About Kitchen Electrical Placement
What is the exact distance a kitchen switch should sit above the countertop?
The standard industry recommendation is to place the bottom of the electrical box approximately 4 inches above the finished countertop surface. Given standard 36-inch base cabinets, this positions the centerline of the switch plate between 40 and 44 inches from the finished floor. This elevation clears the 4-inch splash guards, aligns cleanly with standard tile layouts, and protects controls from countertop spills.
Does the National Electrical Code dictate a mandatory minimum switch height?
No. The National Electrical Code (NEC 404.8(A)) only mandates an upper limit: the operating handle of a general-use switch cannot exceed 6 feet 7 inches (79 inches) above the floor in its highest active position. The NEC does not set a mandatory minimum height for residential wall switches. Standard residential heights (48 inches on open walls, 40–44 inches over counters) are builder trade standards and ergonomic conventions rather than explicit minimum legal mandates.
How do you measure switch height when new flooring has not yet been installed?
To measure switch height accurately on bare subflooring, you must establish the Finished Floor Elevation (FFE) before fastening rough-in boxes to studs. Determine the total thickness of all finished flooring layers—including underlayment, mortar beds, and tile or hardwood (commonly 1/2 inch to 3/4 inch total). Add this thickness to your target rough-in height, mark a reference line on the studs using a story pole or tape measure, and mount the electrical boxes relative to that adjusted benchmark.
Conclusion
Determining the proper height for your kitchen switches is a foundational layout decision that shapes the daily comfort, visual elegance, and long-term accessibility of your home. By coordinating rough-in dimensions with cabinet layouts, tile patterns, and universal reach guidelines, you ensure a smooth, hassle-free remodel that looks beautiful and functions reliably for years to come.
At Performance Electrical Contracting Inc., our licensed professionals deliver pre-qualified, on-time, and value-driven electrical solutions across Jacksonville, Florida, and the greater Southeast. Whether you are remodeling a residential kitchen, managing a multifamily property, or building commercial infrastructure, our team ensures complete code compliance and flawless craftsmanship on every project. For more details on electrical regulations and installation planning, explore our guide to light switch height code requirements or contact us today to schedule your comprehensive project consultation.